Build and Run Step-by-Step
1. Setup your Enviroment
Setup Flutnet based on your operating system
2. Open/Create your project
Use the Flutnet Console to create a new project or download a sample from Github/flutnet.
3. Build the Flutter project
The Xamarin project need a builded version of Flutter.
If you create the project using the Flutnet Console, this procedure is done during the project generation.
In your Flutter/my_app folder execute the commands:
- flutter build aar --no-profile
- flutter build ios-framework --no-profile
4. Expose C# Platform Service to Flutter
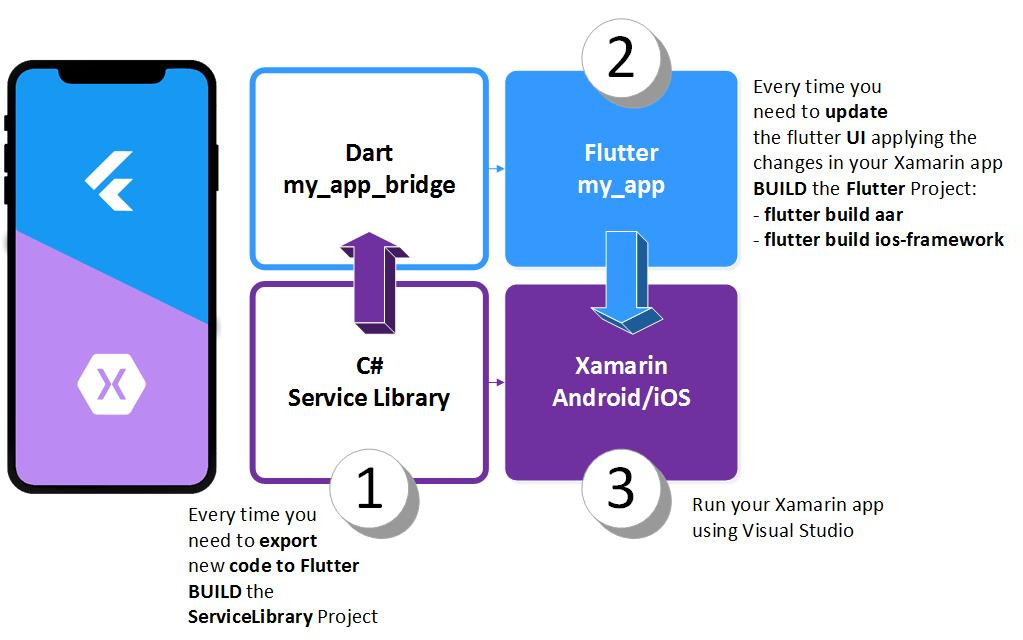
Define your Platform Service, Data and Operations, in the *.ServiceLibrary project.
Build the project using Visual Studio to generate all the Flutter data structure that you will use in your Flutter project. (Flutter/my_app_bridge).
5. Register your Services in the Flutnet Runtime
Expose your services to Flutter using the Flutnet Runtime.
6. Develop the user interface in Flutter
Open the Flutter/my_app project using Visual Studio Code and develop your Widgets in Flutter.
Use all the generated services (Flutter/my_app_bridge) to invoke your native Xamarin code.
7. Update Flutter in the Xamarin project
To see all the changes without using the hot-reload/hot-restart rebuild your Flutter module.
For the Android project ensure to unistall the app from your device before running the project in Visual Studio. See Known-Issues.